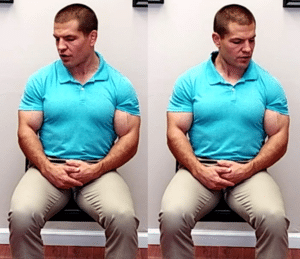
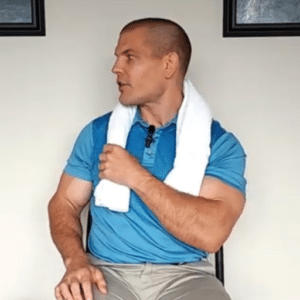
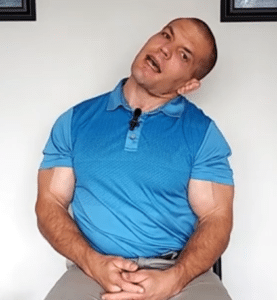
When you have neck pain in can be a real... well, pain in the neck. Fortunately, the 8 neck pain exercises in this video can help you get relief. Watch the video to start feeling better in minutes.
In this post you'll learn:
- What Conditions Can These Neck Pain Exercises Help?
- Exercise 1: Chin Tuck
- Exercise 2: Assisted Head and Neck Flexion
- Exercise 3: Lower Neck / Upper Back Extension
- Exercise 4: Precise Neck Rotation Exercise
- Exercise 5: Assisted Neck Rotation Exercise
- Exercise 6: Segmental Neck Sidebending
- Exercise 7: Shoulder Blade And Arm Elevation
- Exercise 8: First Rib Mobilization With Towel
- Conclusion
What Conditions Can These Neck Pain Exercises Help?
There are lots of different things that can cause neck pain, the most common of which are:
- stiff muscles
- joint problems (including arthritis)
- degenerative discs
- pinched nerves
Not every single exercise on this page is going to work for every person with neck pain, but there will probably be at least a few exercises you find helpful.
I'll do my best along the way to explain which exercises may be appropriate for what type of problems, but before we get started, there are some more serious things that can cause neck pain that will NOT be helped by neck pain exercises.
So if you're having any of the following symptoms, make sure to talk to a healthcare professional before doing these exercises:
- dizziness
- nausea
- double vision
- trouble speaking or swallowing
- numbness in your face or legs
- sudden weakness in your arms or legs
- sudden loss of balance or falling for no reason
- any other symptoms that you find just unusual or strange besides just neck pain or stiffness
Now that we've covered that, here are the 8 neck pain exercises and how to do them.
Exercise 1: Chin Tuck
One of the most common exercises that people do for neck pain is the chin tuck.
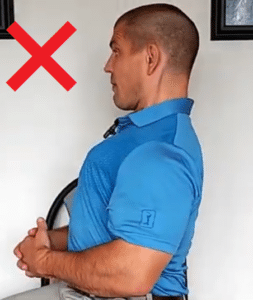
The most common reason people do this exercise is to correct forward head posture.
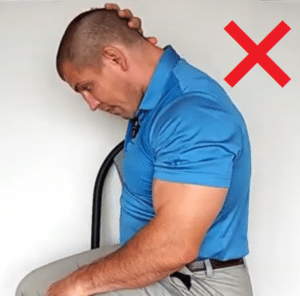
However, the solution to forward head posture is not pulling your head back like a chicken.
The solution to it actually comes more often from your upper back.
If you're working at a computer for a long time or driving in a car and you're hunched over at your upper back, you're going to get a forward head.
The forward head is a compensation for what's going on in the back.
The forward head isn't the problem; it's the compensation for the problem.
And in order to fix the root cause of the problem, you really want to start in the upper back.
Sometimes the problem even traces back all the way to the lower into the lower back or sometimes even into the legs..
So it is important to look into the root cause of the problem.
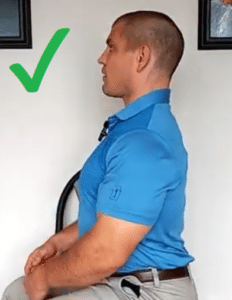
But to fix a forward head, you want to sit up tall by lifting through your chest.
When you do this, you will likely be looking slightly upward. So adjust slightly by doing a small head nod to bring your chin down slightly with the axis of rotation through your ears.
So it's not a big chicken neck movement.
It's just a small, gentle head nod.
If you're having trouble doing that head nod, then it's likely that you have stiffness in these muscles called the suboccipital muscles.
Sub-means below and occiput means your skull. So the muscles right below your skull.
These muscles are a common cause of neck pain and headaches at the base of the skull.
The next exercise will help stretch the suboccipital muscles.
Exercise 2: Assisted Head and Neck Flexion
This exercise can help to get the suboccipital muscles loosened up.
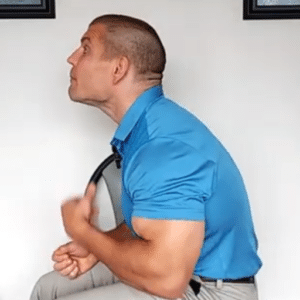
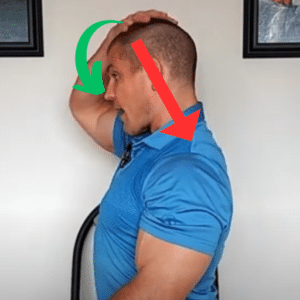
Start by doing the chin nod, then take your hand and compress through the crown of your skull while slightly assisting your head into flexion.
Don't pull your whole neck forward.
Just think about compressing on the head and moving only your head on your neck.
This helps isolate this motion to the upper segments of the neck. So you're just nodding through the upper segment of the neck.
Mid-Neck Flexion Exercise
You can also get more of a middle neck stretch by pulling slight upward traction on the back of your skull while doing this exercise.
Again, you're not pulling your neck forwards; you're actually pulling upward with the hand on the back of your neck while pushing downward with the hand on the front of your head.
Exercise 3: Lower Neck / Upper Back Extension
Now the next exercise works on the opposite movement of extension.
Most people don't need to do extension exercises for their neck.
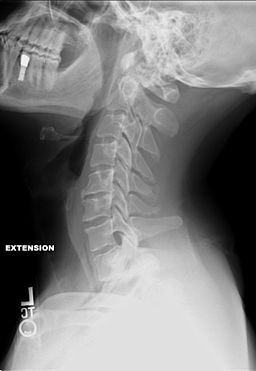
As you start to get older and your discs start to dry out, you start to lose your tolerance for looking upward.
Don't try to push through this!
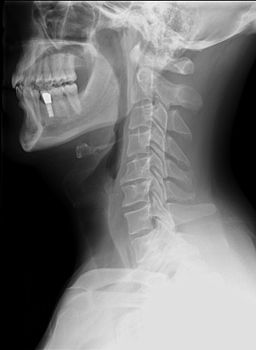
If you look at how the facet joints in your neck are lined up, they kind overlap one another in a 45 degree ankle like shingles on a roof.
When you extend your neck by looking upward, those facet joints get jammed together.
Additionally, neck extension narrows the spaces where the nerve roots come out of your neck, so it can pinch the nerves in your neck.
Additionally, when you sit with a forward head posture, you're already in extension of the neck.
So neck extension is probably not a good exercise for most people.
What IS good is upper back extension or cervico-thoracic extension.
The reason for that is when you sit with a forward head, you're in extension in your upper neck and middle neck and flexion in lower neck and upper back.
And so trying to get extension through the lower neck is good.
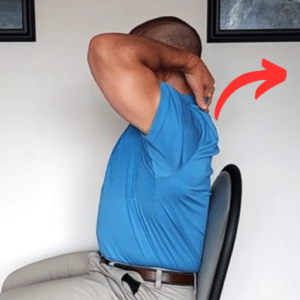
You can do an exercise for lower neck or upper back is by sitting with your back up against the backrest of a chair.
Put your hands behind your neck so that your fingers are clasping to support your neck.
You actually want to a slight chin tuck to flex the upper and middle neck while extending at the lower part of the neck and the upper back.
And so what that'll look like is chin tuck, flex the neck, and then just a slight lift through the chest, extending through the upper back while keeping the chin tucked.
Exercise 4: Precise Neck Rotation Exercise
The next neck pain exercise is for the movement of neck rotation.
This exercise is good for people who have trouble checking their mirrors when driving or turning their neck when they first wake up in the morning
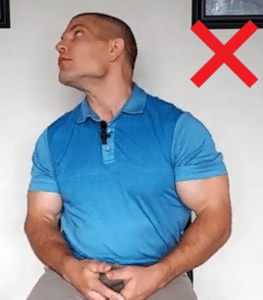
The way that a lot of people instinctively turn their neck is they kind of combine an extension, side bend, and rotation so that they're looking in an up and back movement.
But again, that movement jams the facet joints in then neck together and can even pinch the nerve roots.
So that combined extension and rotation is not a good movement pattern.
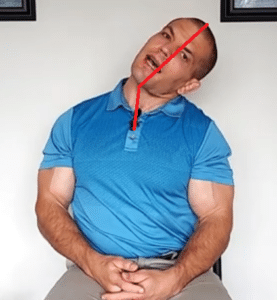
Instead, sit up with good posture through your chest. Then do a slight chin tuck and turn your head as if there's a rod running through your head and neck.
Then just spin around that rod turning chin to shoulder one way, then chin to shoulder the other way.
Just go back and forth five or ten times each way.
You don't want to push it. This isn't a "push as far as you can go" type of exercise.
Just do a nice, easy movement.
If you start to go farther, you'll usually start to use the compensatory movements that you're trying to avoid.
Now, if you notice that you're using that easy, gentle motion, and you just still can't turn your neck as far as you'd like, the next exercise is to help you turn farther.
Exercise 5: Assisted Neck Rotation Exercise
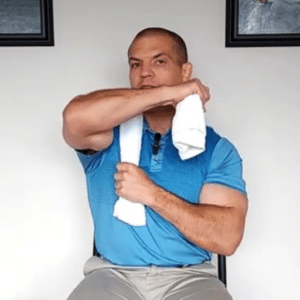
For this exercise, you'll just need a hand towel.
Put the towel around your neck and reach across your body with one hand to grab the towel on the opposite side.
Then reach over top of the first arm with your other arm and grab the other side of the towel.
Pull the towel across your cheek bone with the second hand to help you turn your neck toward that hand.
Turn until you feel a comfortable stretch, hold a second or two, and then return to midline and repeat.
You'll need to do all of your repetitions (start with 5-10) on one side first. Then if you need to stretch in the opposite direction, start over and switch your hands to turn to the opposite side.
Exercise 6: Segmental Neck Sidebending
The next few exercises will address neck sidebending.
One of the most common stretches that I see people do for their neck is bending their head to the side like this.
This exercise is supposed to stretch your upper trapezius and/or levator scapula muscles.
In reality though, this type of exercise treats your neck like it's all one segment.
But remember, your neck is made up of seven different vertebrae.
Therefore, you should be moving at each of these vertebrae.
The movement should be more like a C-shaped curve, not just a hinge.
Usually, when you do a gross movement like the exercise above, you tend to move more through the segments that already move well (or too much), and the segments that are stiff stay stiff.
In order to get the stiff segments to move, you need a little bit of manual over-pressure.
In the clinic, we use hands-on manual therapy techniques like joint mobilization and manipulation.
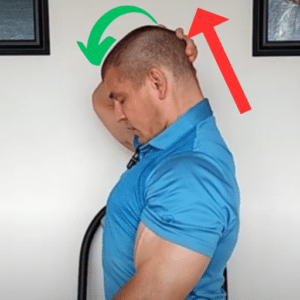
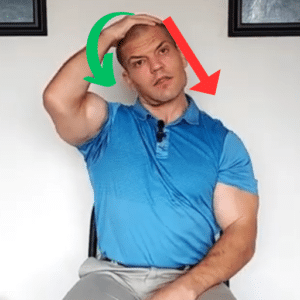
However, to get a similar effect at home, you can take your hand and put it up on top of your head.
Next add vertical compression like you did with the flexion exercise.
Next you tip your head slightly to the side while maintaining the compression so that your compression force is now diagonally down and across.
You can repeat this at various levels of the neck by changing your axis of rotation. (Watch the video.)
By doing this, you can isolate the stretch as best as possible to one segment at a time.
Exercise 7: Shoulder Blade And Arm Elevation
The next exercise is for people who have one shoulder blade lower than the other.
In particular, if your shoulder is lower on the side of your neck that is more painful, then this exercise may be a good fit for you.
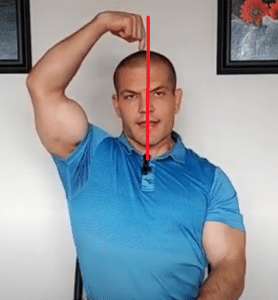
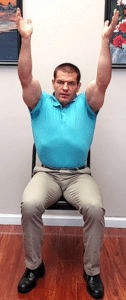
To help a a shoulder blade that's too low, reach both arms up in the air and shrug your shoulder blades.
This helps stretch the stiff muscles below the shoulder blades such as the latissimus dorsi.
You can do it with both arms raised as shown above. Or if you just have one problematic side, you can do the exercise just on one side like this.
Learn more about that stretch here.
Exercise 8: First Rib Mobilization With Towel
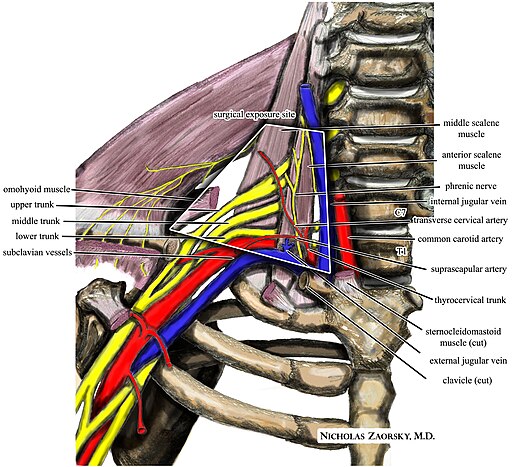
The final neck pain exercise is a first rib mobilization or scalene stretch.
Your scalene muscles attach to your neck and run down to your first two ribs.
There is a bundle of nerves called the brachial plexus that runs through these muscles.
When your scalene muscles get stiff, they can pull your first rib up compressing the brachial plexus.
This is know as thoracic outlet syndrome.
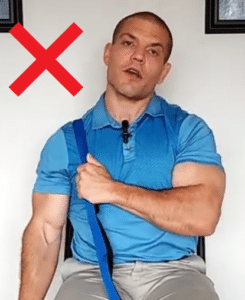
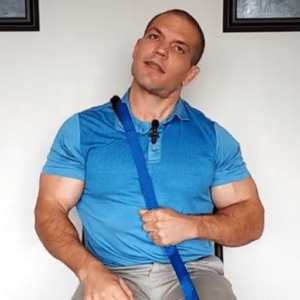
To stretch your scalenes, you need to use a towel, belt, or stretching strap to hold your first rib down.
RangeMaster Flex-Ability Static Stretch ...
Pull the belt, towel, or stretching strap over your shoulder so that it hit's close to the neck.
This is important because if the strap hits too far away from you neck, it's going to further depress your shoulder blade.
Pull the strap across your chest and down towards the opposite hip.
Then just do a slight side bend away from the shoulder that the strap is over.
Go back and forth in a gentle motion 10-15 times.
Conclusion
So those were the eight neck pain exercises. Give them a try and see which ones help you the most. Again, not every exercise will be good for every person.
You should feel better after doing stretches.
Neck exercises aren't supposed to be of the "no pain, no gain" philosophy.
Your best bet would be to meet with a physical therapist who specializes in treating spine problems to get the best exercises for your kind of neck pain.
If you live in the St. Louis area and need help for neck pain, we'd be happy to help you at More 4 Life.
Just tap the button below to request an appointment with one of our specialist physical therapists.


