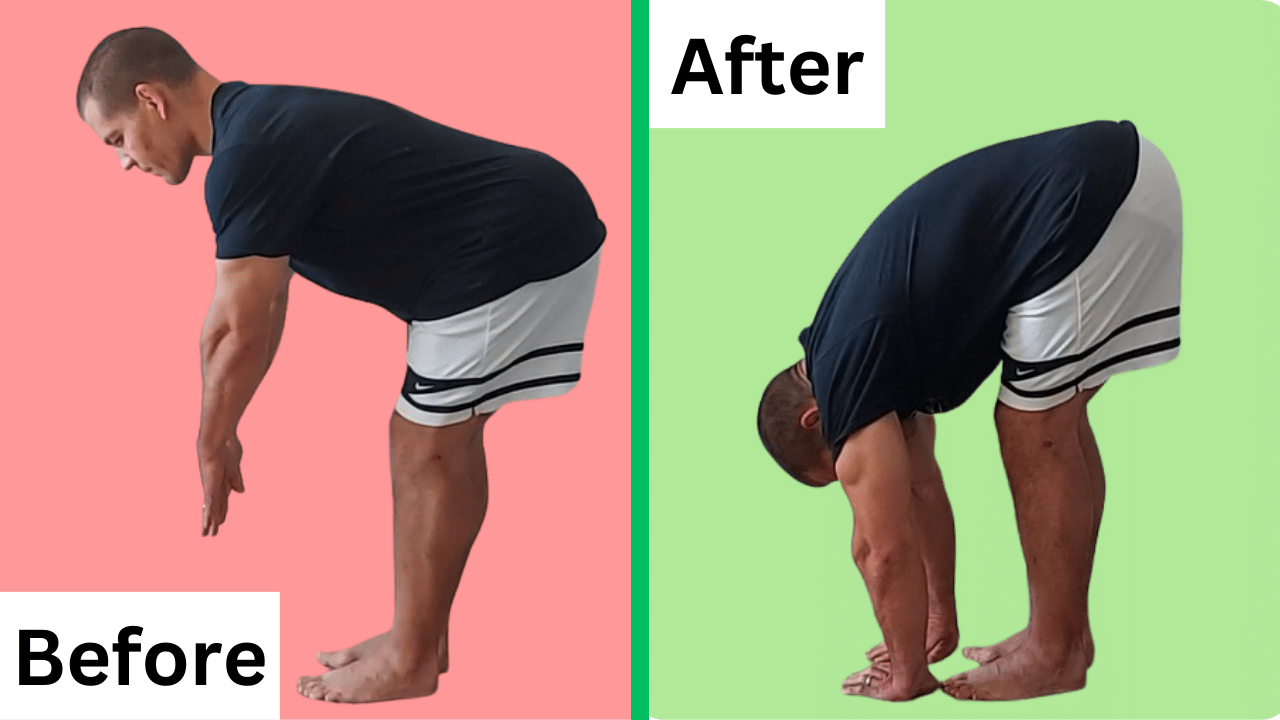
Can't Touch Your Toes?
Use this simple trick to improve your flexibility and be able to touch your toes as soon as today.
Why Be Able To Touch Your Toes?
Being able to touch your toes is generally seen as a sign of hamstring flexibility. However, it's really a combination of spinal mobility, hip mobility, and hamstring and calf flexibility.
Functionally, you need to be able to bend down to pick things up of the floor and tie your shoes. However, there's no rule saying you can't bend your knees to do these things in everyday situations.
If you'd like to be able to bend down more easily though, here's how to touch your toes with your legs straight.
How To Touch Your Toes Quickly
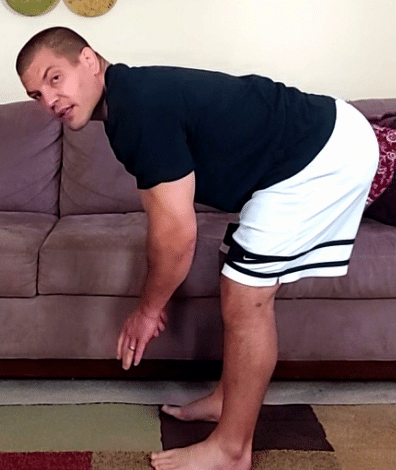
Step 1 - Squat Until You Can Touch Your Toes
First squat down and get to the point where you can touch your toes with your knees bent.
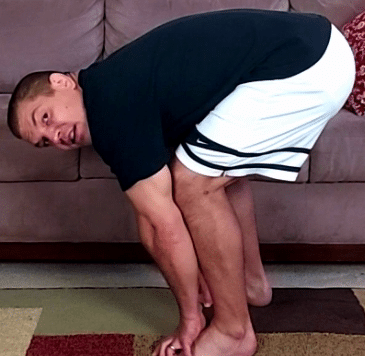
I know, this seems like cheating. However, instead of stretching until you can touch your toes, we're going to start with touching your toes. Then you'll stretch until your knees are straight.
Step 2 - Wrap Your Fingers Under Your Toes
Once you've squatted down to touch your toes wrap your fingers underneath your toes so they're kind of gripping each other.
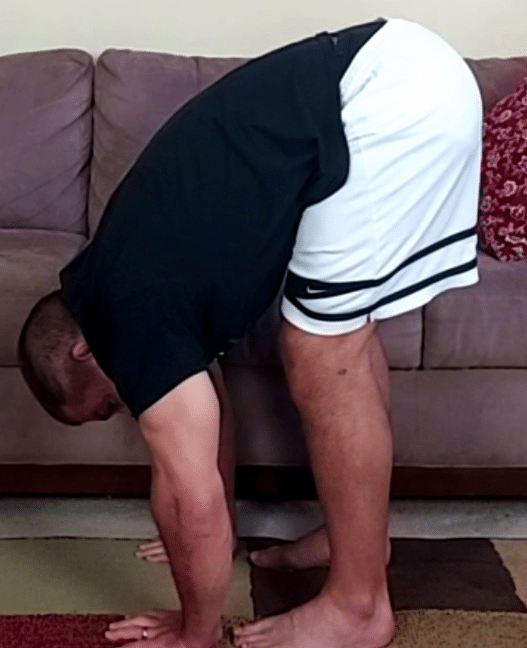
Step 3 - Shift Your Weight Onto Your Toes And Straighten Knees
The next step is to shift your weight forward over onto your toes.
Then use your quadriceps muscles to extend your knees.
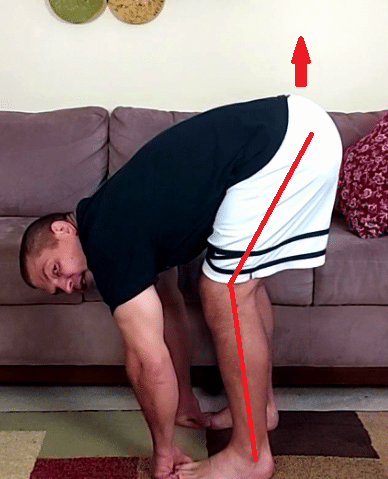
Push your butt up in the air so you feel a slight stretch in the back of your legs.
This doesn't need to be an intense stretch. In fact, it's better if it's not. Just go until you feel a very gentle stretch.
Hold this position about 10 seconds.
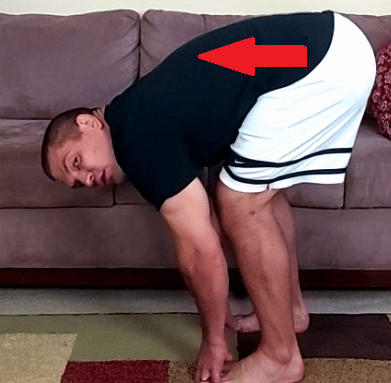
Step 4 - Shift Your Weight Back Onto Your Heels
Now stick your bottom out behind you so the the weight goes onto your heels.
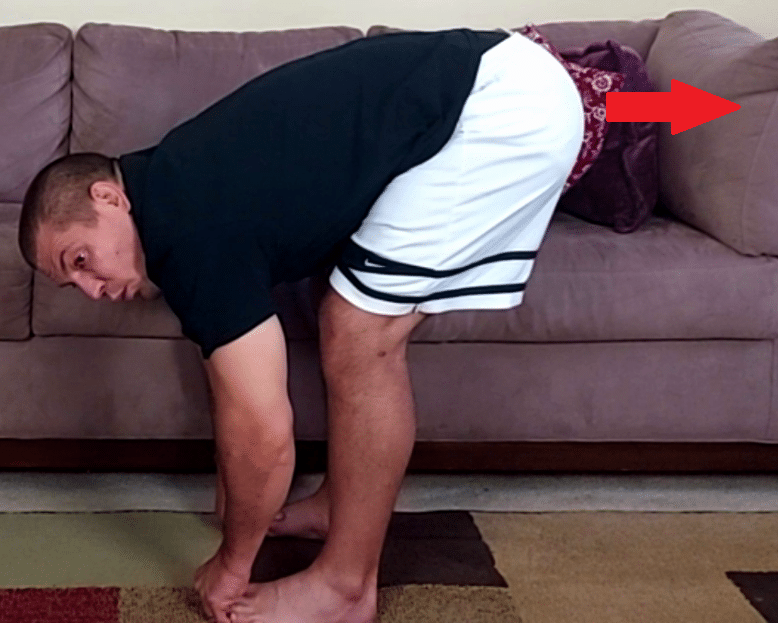
This is where gripping your toes comes in handy as it helps you to maintain your balance while also helping you maintain the stretch.
Hold this position 10 seconds.
Step 5 - Alternate Shifting Weight Between Your Toes and Heels
Next you'll just repeat Step 3 and Step 4 five to ten times, holding each one for about 10 seconds.
So that would be 20 seconds per round x 5-10 for a total of 100-200 seconds of stretching or 1.5-3 minutes total.
Step 6 - Recheck Your Ability To Touch Your Toes
After you've completed your stretching, recheck to see if you can touch your toes.
Depending on your starting point, you may or may not be able to completely touch your toes with your legs straight in a single session. However, I'll bet you'll be a lot closer.
Why Does This Technique Make It Easier To Touch Your Toes?
There are a few biomechanical and neurological principles in play here in this toe touching technique.
Unloading the hamstrings
Your hamstrings are hip extensors. When you just bend down to touch your toes normally, you have to use your hamstrings to keep your trunk from from falling forwards.
So your hamstring muscles have to contract to hold you up.
When a muscle contracts, it's actually trying to shorten itself. However, when you're stretching, you're trying to lengthen a muscle.
Therefore, if the muscle is trying to shorten itself while you're trying to lengthen it, it doesn't work out so well.
However, when you put your weight forward onto your toes, your center of gravity moves in front of your ankles.
This allows you to use your calves to help maintain your balance and unloads your hamstrings so that they're not doing the work of holding you up.
Reciprocal Inhibition
When you use your quadriceps muscles to straighten your knees, you're using a neurological principle known as reciprocal inhibition.
What that means is when one muscle contracts, its opposing muscle relaxes.
In this case, when the quadriceps contract, the hamstrings reflexively relax so that you cans stretch them farther.
Autogenic Inhibition
When you shift your weight back onto your heels, you center of gravity falls back behind your ankles, so now your your hamstrings, are contracting again hold you up.
This is is kind of like an isometric strengthening exercise, but they're being strengthened in a new, longer length than they're used to being in.
So you're training your hamstring muscles to learn how to work in the new range of motion that you've just acquired.
Now, after you've held that position for a while, when you shift back forward, that calls in the principle of autogenic inhibition.
Autogenic inhibition means that a muscle inhibits itself.
So after you've contracted the hamstring muscles for a period of 10 seconds and then you relax them, your hamstrings go through a brief relaxation period where you have the ability to stretch them a little bit more.
By alternating loading and unloading the hamstrings and using the principles of reciprocal inhibition and autogenic inhibition, you can rapidly improve your flexibility.
As another added bonus, because you're using neurological principles to "trick" your muscles into relaxing rather that trying to force the muscles to lengthen using static stretching, this is a much gentler, safer form of stretching.
Need More Help To Improve Your Flexibility?
If you're in the St. Louis area, and you'd like to improve flexibility so that you can stay active, mobile, and healthy without pain, then we'd be happy to help you.
Just tap the button below to request an appointment with one of our specialist physical therapists.
Additionally, here are some other posts about how to relieve pain when walking:
Why Do I Get Back Pain When I Wake Up?
How To Relieve Pain In Foot In The Morning
Why Does My Ankle Hurt When I Wake Up?
Try This Unique Exercise For Walking Balance, Flexibility, and Strength
Spinal Stenosis And Walking Problems
3 Ways To Relieve Back Pain When Walking